Gemini Notebook (formerly NotebookLM) and GenAI for everyday project work.
Who this is for
Business analysts, project and product managers, knowledge workers and non-technical stakeholders. No coding required.
Today’s outcome
Build a checked Gemini Notebook for one project — cited answers, an action list, a risk check, a RACI and a timeline — and plan where you will use it at work.
Four hours · Five hands-on exercises on one project.
First, the people: who’s in the room, and what work you brought with you.
Session 1 · Welcome
Hello, I’m Azhan.
Before we open any tools, let’s meet the room.
Your trainer
Azhan Abdullah — edtech and data analytics trainer. I help teams turn everyday documents and data into decisions they can check.
Icebreaker · 20 seconds each
Your name and role.
One document task that eats your time — meeting notes, reports, proposals or policies.
What a good result would look like.
More than 20 of us? Share at your table, then two volunteers tell the room.
Show of hands: how confident are you with AI tools today — 0, 1 or 2? Keep your task in mind; we come back to it at the end.
With that task noted, let’s get your account and files ready.
Session 1 · Welcome
Ready check · 2 min
Ready check: two things before we start.
Two minutes now saves twenty later. Put your hand up if either step fails; we will pair you with a neighbour.
1 · Open Gemini Notebook
Go to notebook.google.com.
Sign in with the Google account you will use today. A personal account is fine; some work accounts block Gemini Notebook.
Save them somewhere easy to find, such as Downloads. No need to open them.
About the files: these five documents come from a company’s Learning Hub pilot. Staff training there is still arranged by email and tracked in spreadsheets, so the company wants to try an online staff learning portal. Before buying it for everyone, it is running a small pilot. The files are that pilot’s paperwork: the approved plan, an older draft of it, the minutes of a management meeting, an offer from Meridian Learning Services, a supplier, and the latest status report with its list of risks. All names and figures are made up for practice.
Slide decks and infographics in Studio need an account for someone aged 18 or over. Everything else today works on any account that can open Gemini Notebook.
Everything open? Here’s how the four hours build one checked notebook.
Session 1 · Welcome
Four hours: understand, practise, apply.
Every module follows the same pattern: explanation, worked example, exercise, debrief.
Length
Module
Activity
What you’ll have
10 min
Welcome, ready check and your work task
One work task
20 min
1
GenAI & grounding
Explain one limit
30 min
2
Use the notebook · Exercise 1
Right source selected
35 min
3
Prompt & verify · Exercise 2
Checked briefing saved as a note
55 min
4
Work with project documents · Studio, Exercise 3
Report started; three cited tables
15 min
Break
25 min
5
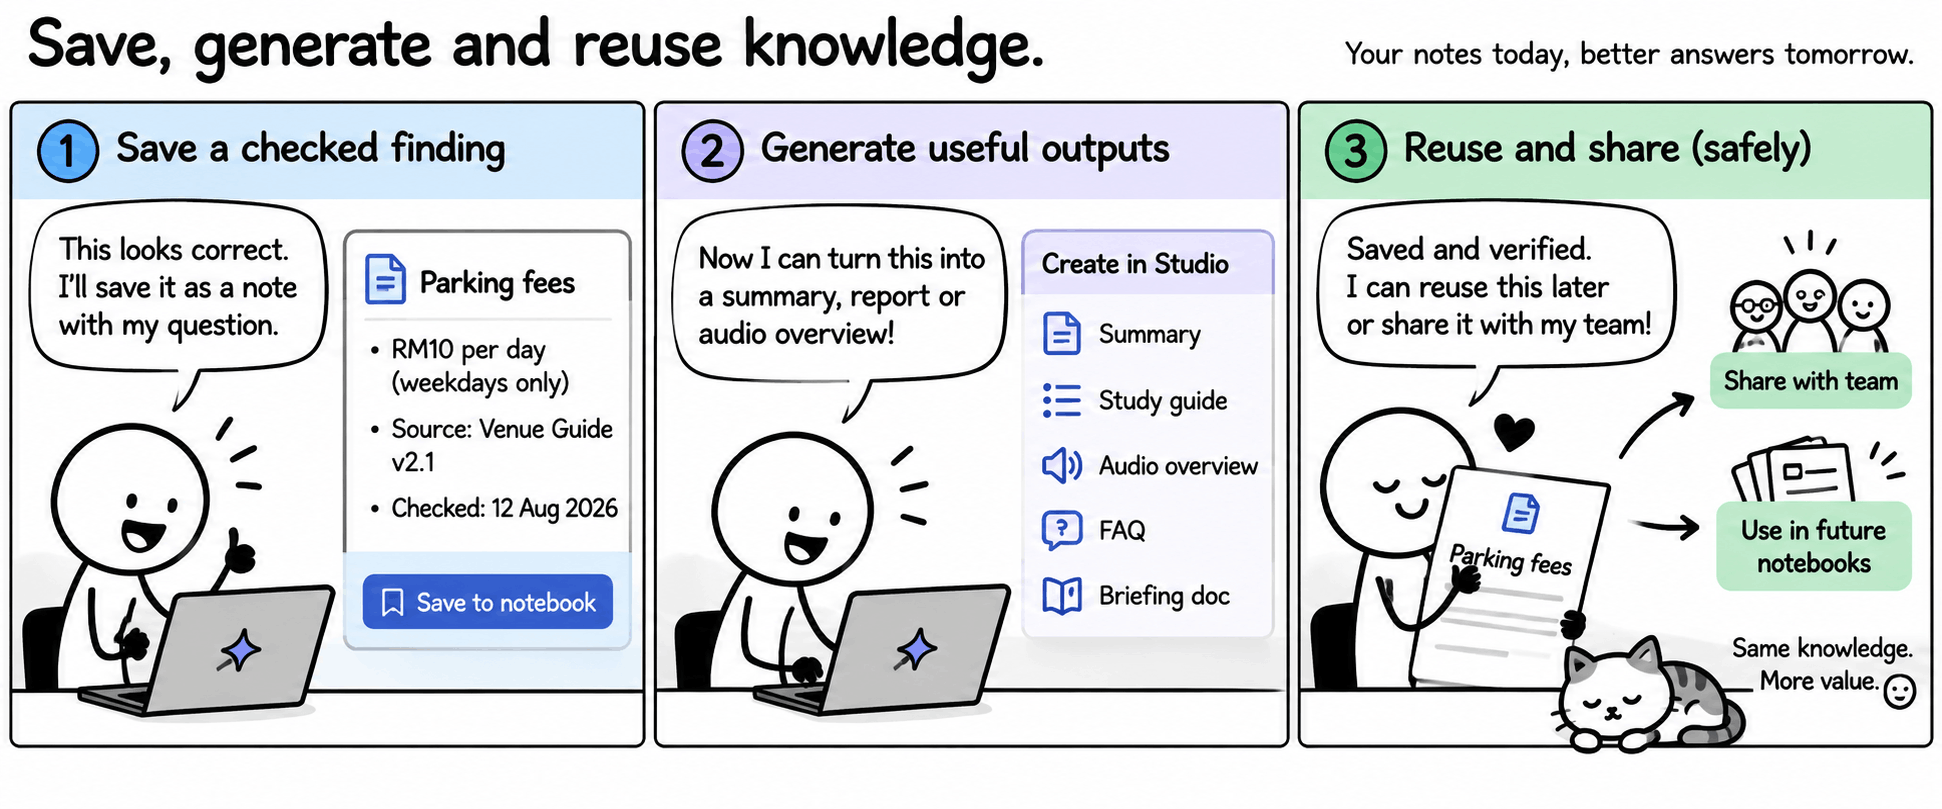
Save, generate & reuse · Exercise 4
Report checked, two outputs, access set
30 min
6
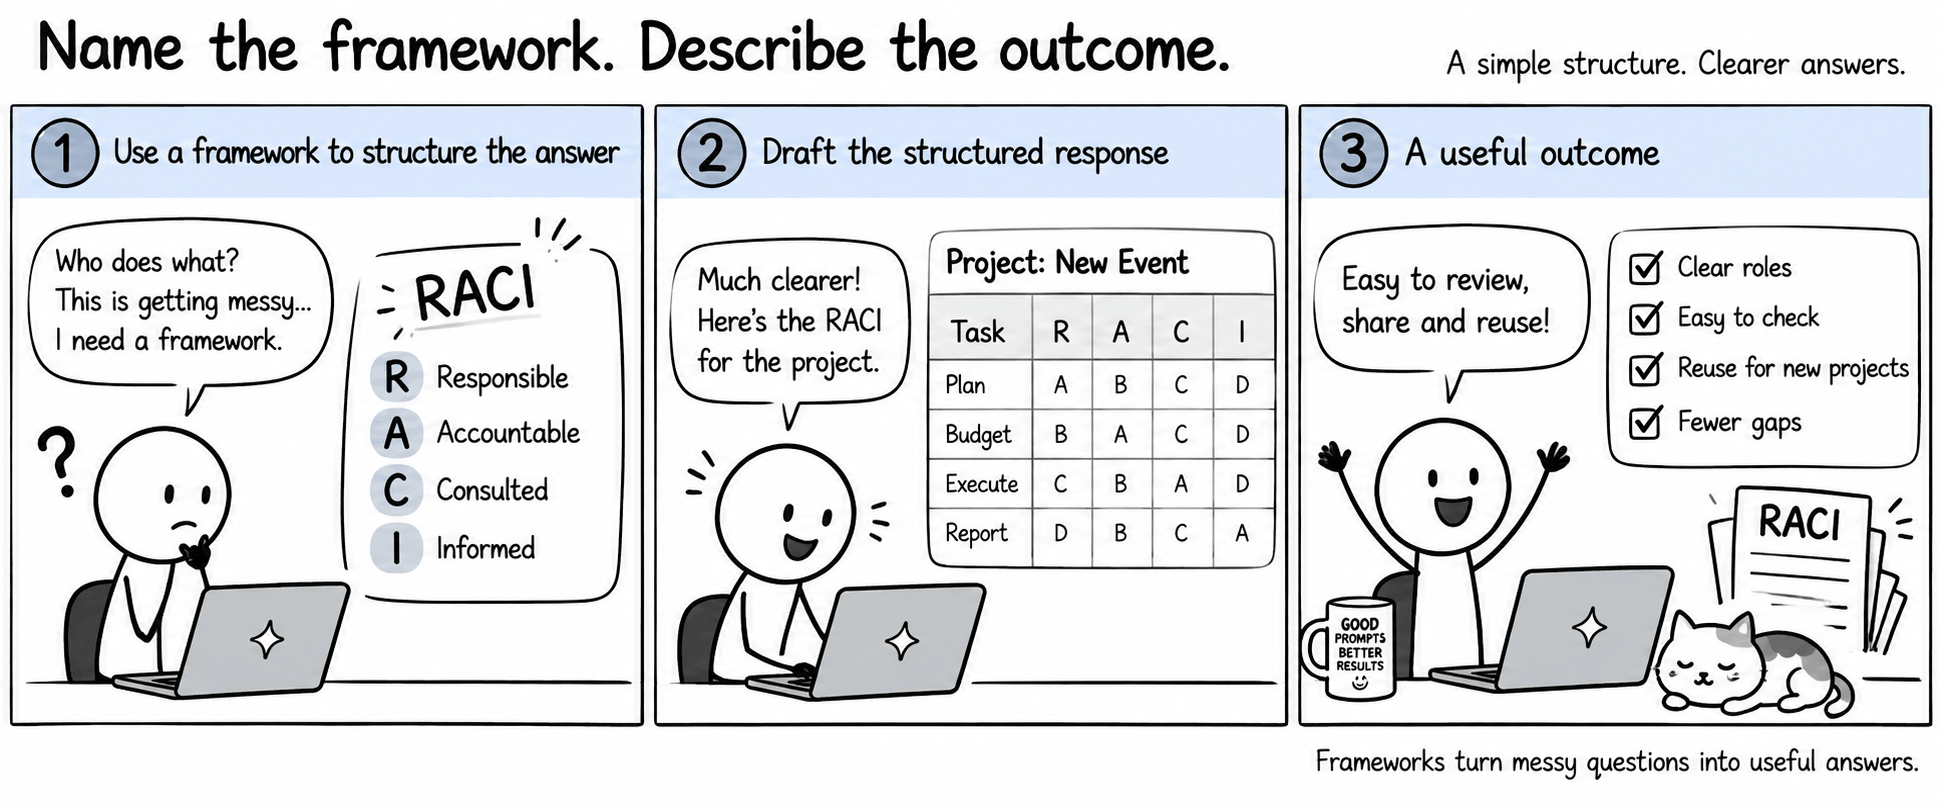
Frameworks: RACI & timeline · Exercise 5
Two checked tables, one in Sheets
20 min
7
Wrap-up & next steps
Exit check and action plan
First stop on the plan: what generative AI actually is.
Session 1 · Module 1 · GenAI & grounding
What are GenAI and large language models?
The difference that matters: a search tool finds what already exists. Generative AI writes something new.
A search tool finds
“What did we agree about the supplier pilot?”
It returns the file and the line that already contains the answer. Nothing new is written. If no document says it, you get nothing back.
Generative AI writes
“What did we agree about the supplier pilot?”
It produces new sentences that appear in no document. If no document says it, it can still write a fluent answer — which is why the rest of this session is about checking.
LLM (large language model) is the text kind of GenAI. It learned the patterns of language from vast amounts of writing — not the facts of your project. That is why a fluent answer can still be wrong.
Now that you understand what GenAI is, let’s look at what happens when you ask it for help.
Session 1 · Module 1 · GenAI & grounding
What happens when I ask generative AI for help?
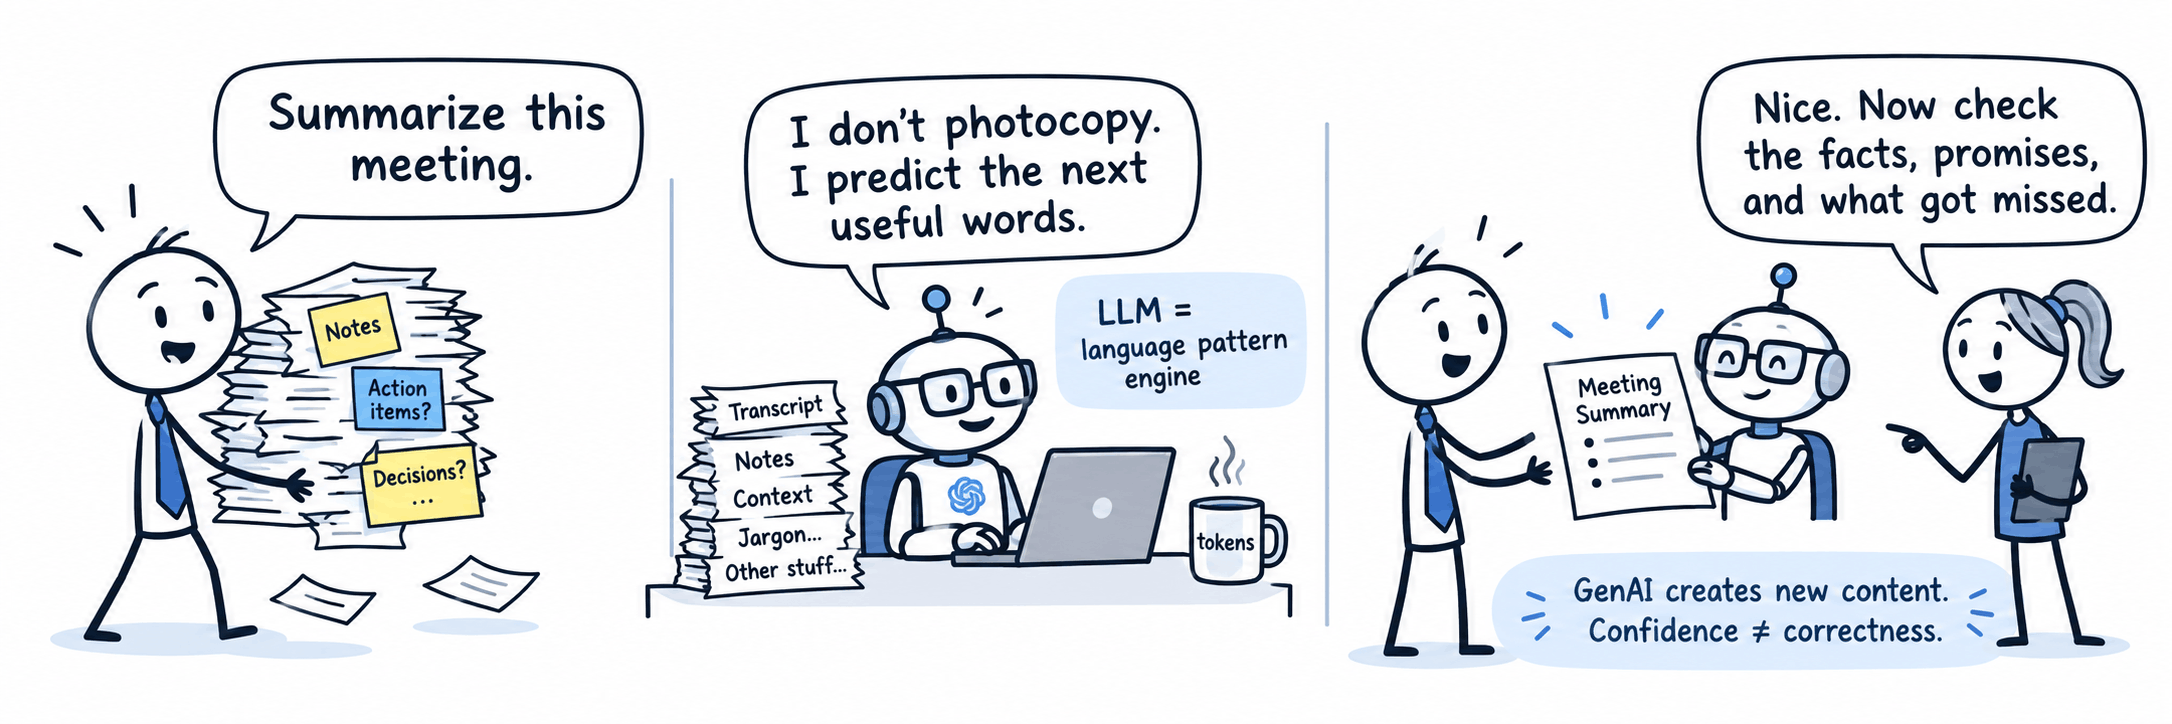
Generative AI writes new text by predicting likely next words. It does not copy or look up the answer.
You give it a task and material, such as meeting notes.
The model predicts useful wording, so the result reads fluently.
You check the facts, promises and anything it missed.
Ask the room: does a confident answer prove a claim is true? Take two answers before moving on.
If the model only predicts wording, how do we get facts into its answers? That’s grounding.
Session 1 · Module 1 · GenAI & grounding
Grounding and RAG: bring evidence into the answer.
RAG means Retrieval-Augmented Generation: finding relevant material and using it as context for a generated answer.
Start with source documents, such as a charter and meeting minutes.
Relevant passages provide context for the question.
The model generates an answer; citations let you inspect the supporting material.
This shows the idea, not Google’s exact system. Grounding reduces made-up answers but does not guarantee accuracy.
Gemini Notebook is grounding you can use every day. Here’s what it is.
Session 1 · Module 1 · GenAI & grounding
What is Gemini Notebook?
An AI research assistant organised around notebooks and your source documents.
What it does
Answers questions across your documents with citations, summarises them and turns them into reusable outputs.
Business value
Less time hunting for passages, more time checking what they say and deciding what to do.
Pair talk · 2 minutes: which three documents from your own work would you put in one notebook, and what would you ask them first? Today’s example is the Learning Hub pilot: a charter, an old draft, steering minutes, a supplier proposal and a risk register.
Formerly NotebookLM — renamed Gemini Notebook in July 2026. Same notebooks and features; notebooklm.google.com still opens it.
You know why answers need sources. Module 2 opens the notebook where your sources live.
Session 1 · Module 2 · Use the notebook
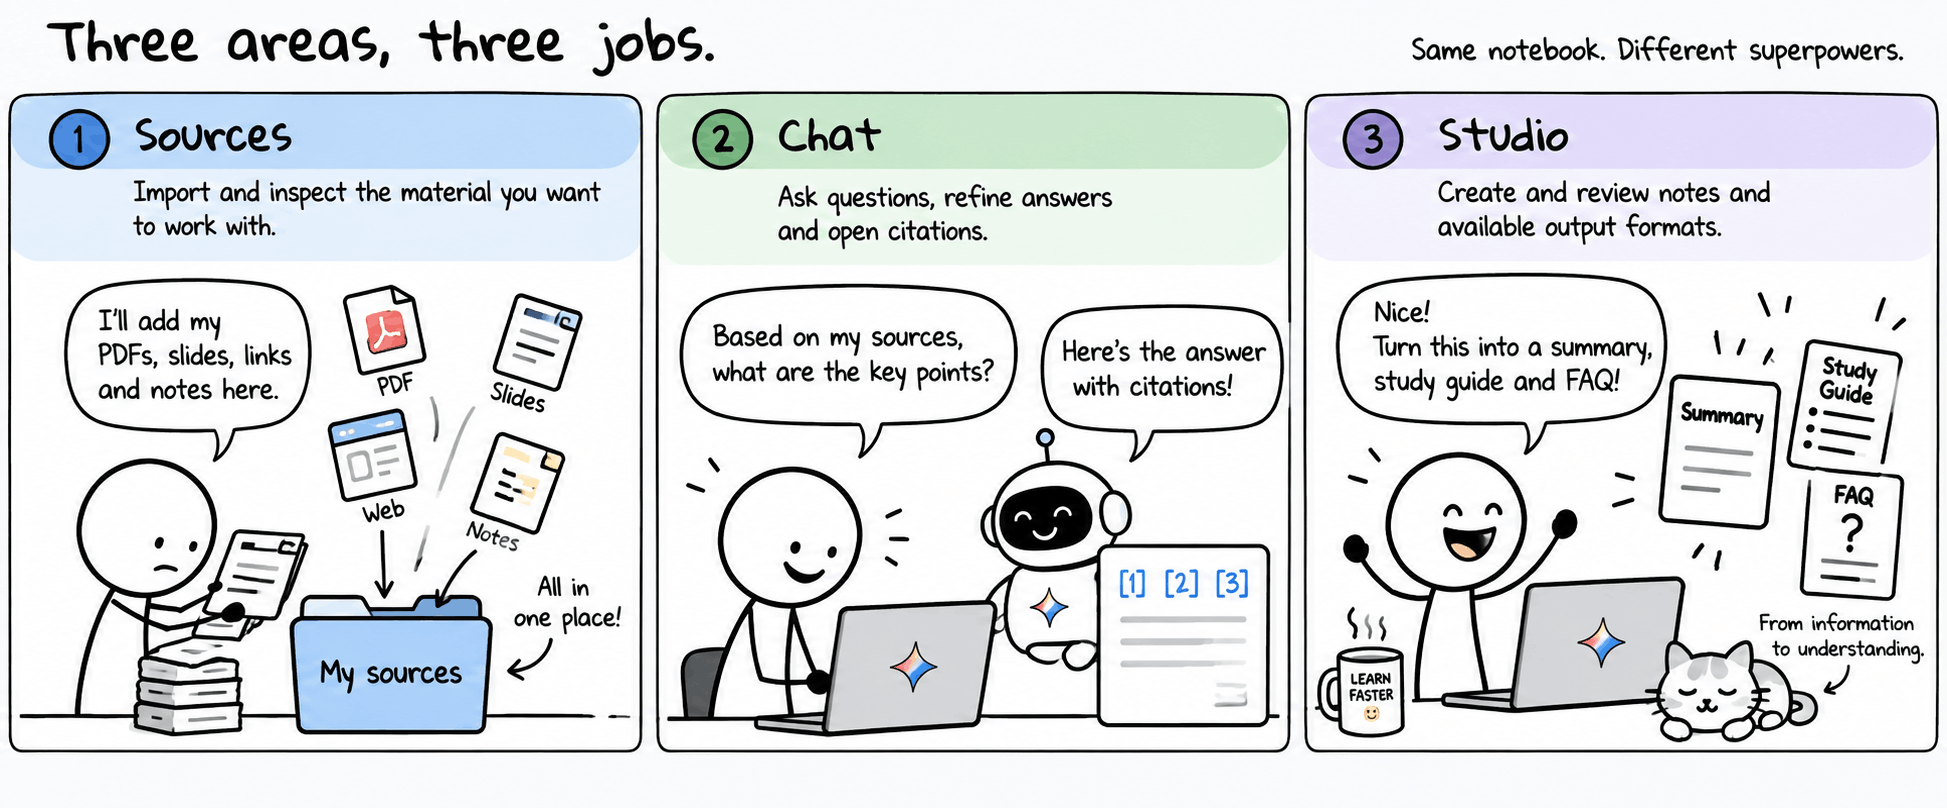
Three areas, three jobs.
Sources (left): add and inspect the material you want to work with.
Chat (middle): ask questions, refine answers and open citations.
Studio (right): create notes and outputs such as reports and audio overviews.
Chat answers from the sources ticked in the Sources panel. Untick a source to leave it out; it stays in the notebook.
The left panel decides what Chat can see, so start there.
Session 1 · Module 2 · Use the notebook
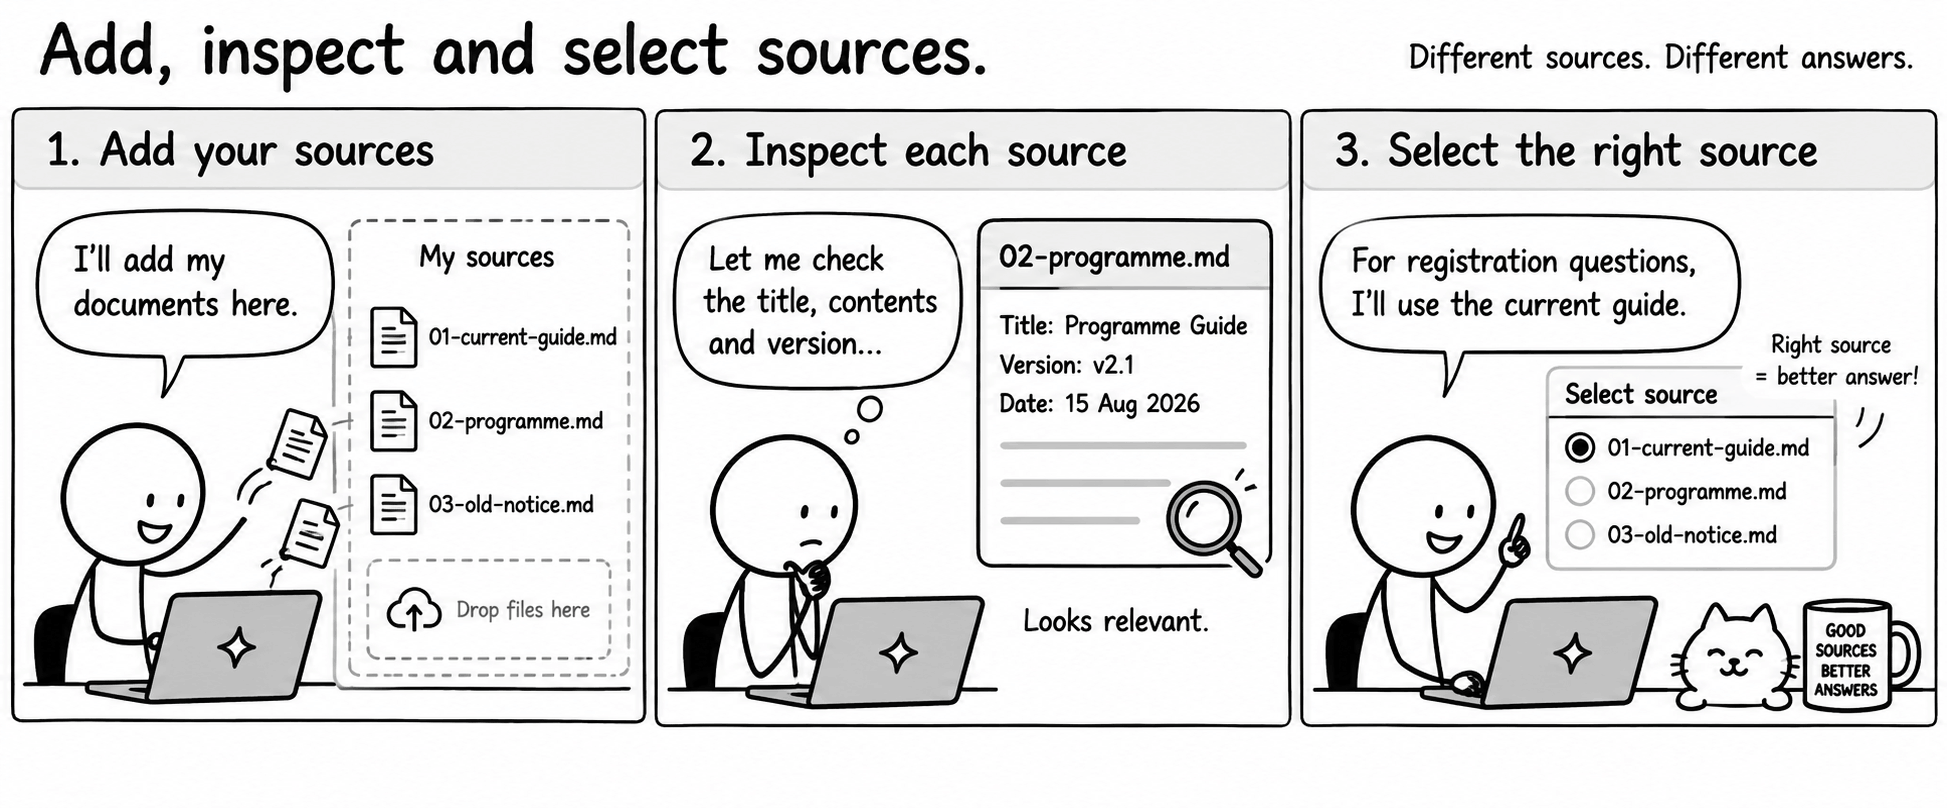
Add, inspect and select sources.
The answer depends on the sources you select.
Add: upload PDFs, Google Docs, web pages or pasted text — up to 50 sources on the free plan.
Inspect: open a source to check its title, status and version, and read its Source guide.
Select: tick the sources Chat may use. Unticked sources stay in the notebook.
Good sources: quality over quantity, clear file names with version and date, and remember the notebook only knows what you add.
Before you add your own documents, one question: what is safe to upload?
Session 1 · Module 2 · Use the notebook
What is safe to upload?
Today’s files are fictional. Before you upload work documents, check what belongs in a notebook.
Fine to upload
Documents your organisation allows you to use with AI tools.
Approved, current versions of project and policy documents.
Public material such as published reports and web pages.
Keep out
Personal data: IC numbers, salaries, health or performance records.
Client-confidential or restricted documents without approval.
Passwords, keys and other credentials.
Check your organisation’s AI policy and which account you are signed in with — work or personal — before you upload anything from work. Share notebooks only with the people who need them.
You know what goes in and what stays out. Time to build your first notebook.
Session 1 · Module 2 · Use the notebook
Exercise 1 · Instructions
Exercise 1: set up the Learning Hub notebook.
Goal
Create one notebook for the project and see how the selected source changes the answer.
Time
18 minutes · individual
You need
Gemini Notebook and the five project PDFs you downloaded in the ready check.
Steps
Click Create new notebook. In the pop-up, upload the five PDFs from your Downloads folder (if an upload fails, choose Copied text and paste the document’s text instead).
Click the title at the top and rename it Learning Hub Pilot.
Open each source and check its status and version.
Tick only the approved charter (01) and ask “When does the pilot start, and what is the budget?” Repeat with only the draft (02).
Save a note: which answer applies and why. Then tick all five sources again for the next exercises.
Done when
Both answers shown, and you can name the one that applies: 3 November 2026 and RM10,000, from PRJ-01.
Save in notebook
A note: which charter applies, and why
Finished early?
Tick both charters and ask the same question. Does Chat say which one is approved, or mix them? Note what it does with the conflict.
Stuck? Play one step, try it, then press Next step.
Notebook built and two answers compared? Let’s see what the selected source changed.
Session 1 · Module 2 · Use the notebook
Exercise 1 debrief
The right source gives the right answer.
What Exercise 1 showed, and where it pays off at work.
What you learned
A notebook only knows the sources you add. One notebook per project keeps answers focused.
Selecting a different source changes the answer: the draft charter says 1 October and RM12,000; the approved charter says 3 November and RM10,000.
Check each source’s status and version before you rely on it.
Apply it at work
Policies and SOPs: load only the current version; keep superseded ones clearly labelled for comparison.
Projects and clients: one notebook each, with version and date in every file name.
Before a meeting: untick drafts and ask questions of approved documents only.
Try this week: gather the three to five current documents for one work project and name each with its version and date.
The right sources give the right answer. Module 3 is about asking the right question.
Session 1 · Module 3 · Prompt & verify
A useful prompt specifies the job.
Choose the kind of question you need, then say who the answer is for and what shape you want.
Question type
Use it to
Learning Hub example
Factual
Find one fact
“What is the budget cap in the approved charter?”
Summarising
Condense a source
“Summarise the steering committee minutes in three bullets.”
Comparative
Contrast two sources
“How does the draft charter differ from the approved charter?”
Synthesising
Connect sources
“Which risks in the register also appear as open issues in the minutes?”
Team-briefing prompt
Using only the approved charter, write a three-bullet briefing for a new team member: when the pilot starts, the budget, and who leads the project. Cite each claim. If a detail is missing, say it is not documented.
A good prompt gets you a cited answer. Next comes checking that citation.
Session 1 · Module 3 · Prompt & verify
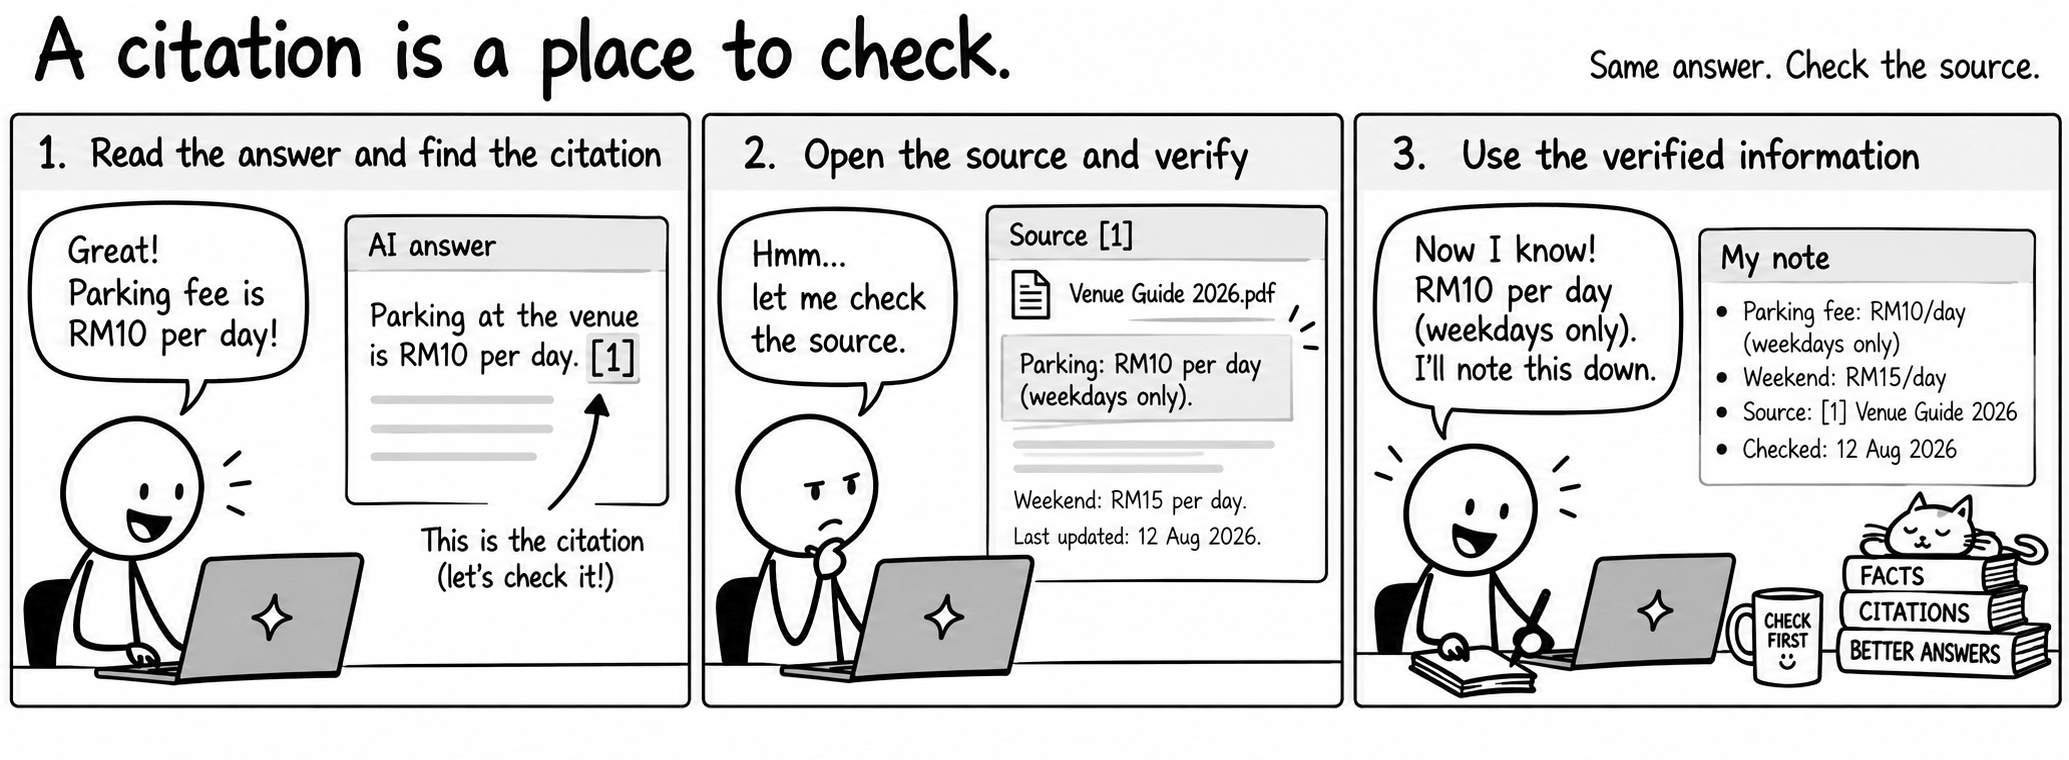
A citation is a place to check.
Check that the passage supports the exact claim, including dates, amounts and conditions.
Find the citation number after a claim, such as [1].
Click it to open the highlighted passage in the source.
Read it: does it support the exact date, amount or name?
If the source is silent, write “not documented”. Do not fill the gap with a guess.
A citation shows where to look; it does not prove the claim.
So a citation is where checking starts. Try it on four questions and a team briefing.
Session 1 · Module 3 · Prompt & verify
Exercise 2 · Instructions
Exercise 2: ask, check and save.
Goal
Ask four kinds of question, then prove each fact in a team briefing against its source.
Time
22 minutes · individual, then swap with a partner
You need
Your Learning Hub Pilot notebook with all five sources ticked.
Steps
Ask the four example questions from the “A useful prompt” slide (factual, summarising, comparative, synthesising). Open one citation for each answer.
Paste the team-briefing prompt below, then follow up: “Make it shorter without adding facts.”
Click each citation and check the start date, budget and project lead against the passage.
Ask “What is the contingency budget?” Record the answer as not documented.
Save the checked briefing as a note. Swap with a partner: can they trace one fact to its source?
Done when
Four question types tried, three facts checked, one gap recorded and a note saved.
Save in notebook
Your checked team briefing as a note
Finished early?
Rewrite one example question with an audience and a format, e.g. “for the sponsor, in three bullets”. Compare the two answers: what changed, and did any fact change?
Stuck? Play one step, try it, then press Next step.
Team-briefing prompt
Using only the approved charter, write a three-bullet briefing for a new team member: when the pilot starts, the budget, and who leads the project. Cite each claim. If a detail is missing, say it is not documented.
Briefing checked and saved? Here’s what the checking caught.
Session 1 · Module 3 · Prompt & verify
Exercise 2 debrief
A citation is where checking starts.
What Exercise 2 showed, and where it pays off at work.
What you learned
Factual, summarising, comparative and synthesising questions give four different kinds of answer.
A citation shows where to look. You still compare the claim with the passage.
“Not documented” is a useful answer: it tells you what to ask a person.
Apply it at work
Emails and briefings: ask for cited bullet points, then spot-check names, amounts and dates.
Questions from managers or clients: when the source is silent, say so instead of guessing.
Save the checked answer as a note so colleagues reuse checked facts.
Try this week: the next time you summarise a document with AI, open two citations before you send it.
Asking and checking work on any document. Module 4 puts them to work on real project tasks.
Session 1 · Module 4 · Work with project documents
One notebook, three project tasks.
The same method works on the documents every project produces.
A. Proposal vs approval
Compare a supplier proposal with the charter and minutes. A proposal is not a decision.
B. Minutes to actions
Turn minutes into actions with owners and deadlines. Keep suggestions separate from decisions.
C. Risk register check
Check every risk has a score, an owner and a response. Flag the gaps.
In Exercise 3 you do the three tasks one after another, about seven minutes each, and check the answer after each one. First, you set a Studio report building so it is ready after the break.
Three tasks, one notebook. Before you split up, meet the panel that turns sources into outputs.
Session 1 · Module 4 · Work with project documents
Studio turns your sources into outputs.
Studio is the right-hand panel. Pick a tile and it builds an output from the sources you ticked.
Tile
What you get
Reports
An interactive report, or a structured text document from a template you can edit
Audio Overview
A podcast-style discussion of your sources
Video Overview
Narrated slides that explain the main points
Mind Map
The topics and how they connect
Flashcards, Quiz
Questions to test yourself on the key facts
Infographic, Slide Deck
A one-page visual or a draft set of slides
Data Table
Rows and columns you describe, ready to export to Sheets
Three habits
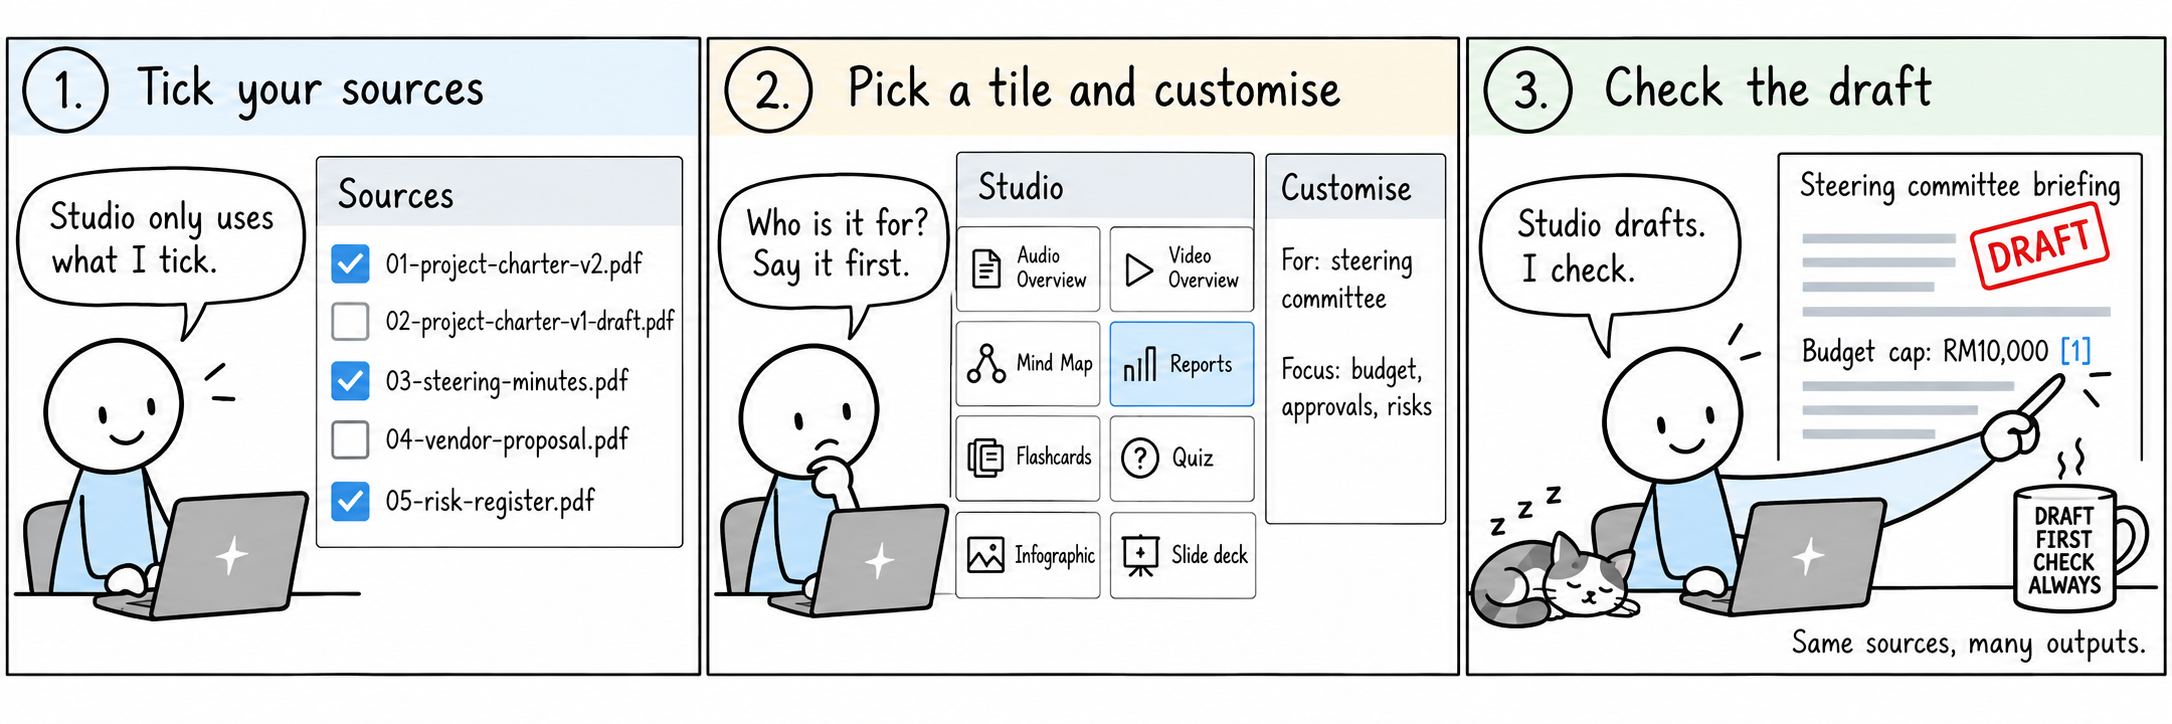
Tick first. Studio starts from the sources you ticked; each settings window shows which it will use.
Customise. Before you generate, say who it is for and what to focus on.
Treat it as a draft. Open the output and check its claims against the sources.
Every settings window shows your AI Usage. Choose Generate now, or Generate later to queue it. Finished outputs are listed under the tiles.
A Studio report takes a few minutes to build, so start one now.
Session 1 · Module 4 · Work with project documents
Prep · 2 min
Set a report building before Exercise 3.
Studio takes a few minutes, so start it now. It builds in the background while you work, and you check it in Exercise 4.
2 minutes · Everyone, in your Learning Hub notebook
Sources (left): tick PRJ-01 charter, PRJ-03 minutes, PRJ-04 proposal and PRJ-05 status report. Untick PRJ-02, the old draft.
Studio (right): click Reports. Leave the format as it is.
Click the pencil on the template, replace its text with the prompt below, and click Generate now.
Leave it running and carry on. If your AI Usage bar is nearly full, choose Generate later; the trainer will share a copy.
Report prompt
Write a steering committee briefing on the Learning Hub pilot covering budget, approvals and risks. Use a short section for each, and a table for the risks with owner and response. Use only facts from the sources and mark anything missing as "not documented".
Stuck? Play one step, try it, then press Next step.
While the report builds in the background, take the three tasks one at a time, starting with the proposal.
Session 1 · Module 4 · Work with project documents
Exercise 3 · Task A of 3
Exercise 3A: can we sign the supplier’s offer?
Three short tasks on the same notebook, one after another and on your own. About seven minutes each; the answer follows each task. Your Studio report keeps building in the background.
About 7 minutes · on your own
Sources (left): untick all, then tick only PRJ-04 proposal, PRJ-01 charter and PRJ-03 minutes.
Copy the prompt below, paste it into Chat (middle) and send.
Click two citation numbers in the answer. Does the highlighted passage really say that?
Ask the practice question: list the payment stages. Is staff (end-user) training included?
Task A prompt
Compare the supplier proposal with the approved charter and the steering committee minutes. Make a table with columns: item, proposal, charter or minutes, conflict?, citation. Then answer: can we sign with Meridian now? Cite what is still missing. Do not infer approval from a proposal.
Table made and two citations checked? Compare it with the answer.
Session 1 · Module 4 · Work with project documents
Exercise 3 · Answers A
A. Proposed does not mean approved.
Meridian proposes RM12,000. The approved charter caps the budget at RM10,000.
What your table should show
RM12,000 is RM2,000 over the RM10,000 cap.
No purchase approval is recorded (PRJ-01, PRJ-03).
Meridian proposes 1 October; the charter targets 3 November.
Data migration is excluded, and nobody owns existing training records.
So, can we sign now? Not yet. Practice answer: 50% at kick-off and 50% on completion; staff training is not included, only one two-hour administrator session.
The proposal isn’t approved yet. So what did the minutes actually ask people to do? That’s task B.
Session 1 · Module 4 · Work with project documents
Exercise 3 · Task B of 3
Exercise 3B: who must do what, and by when?
About 7 minutes · on your own
Sources (left): untick all, then tick only PRJ-03 minutes and PRJ-05 status report.
Copy the prompt below, paste it into Chat (middle) and send.
Click two citation numbers in the answer. Does the highlighted passage really say that?
Ask the practice question: use the status report to give each action its current status.
Task B prompt
From the steering committee minutes, produce a table: action, owner, deadline, status and citation. Separate decisions from suggestions. Write “not assigned” when no owner is given.
Action table done? Here’s what it should show.
Session 1 · Module 4 · Work with project documents
Exercise 3 · Answers B
B. Turn minutes into an action list.
A helpful summary keeps who does what, and by when.
What your table should show
Aina Rahman: request revised pricing within the cap, plus support times and cancellation terms, by 18 September.
Kumar Selvam: check staff account access by 19 September.
The 3 November start is a suggestion in the minutes, not a decision; the charter approved it later, on 22 September.
Existing training records: not assigned.
Practice answer: the status report shows pricing requested on 17 September but not received; the access check is done, with six accounts to fix.
Every action has an owner except one. Task C shows why that gap matters.
Session 1 · Module 4 · Work with project documents
Exercise 3 · Task C of 3
Exercise 3C: which risk has no owner?
About 7 minutes · on your own
Sources (left): untick all, then tick only PRJ-05 risk register and PRJ-03 minutes.
Copy the prompt below, paste it into Chat (middle) and send.
Click two citation numbers in the answer. Does the highlighted passage really say that?
Ask the practice question: which decision in the status report would close R3?
Under the answer you checked, click Save to note.
Task C prompt
From the risk register, list each risk with its score, owner, response and citation. Flag any risk without an owner or a response, and say which open issue in the minutes it matches.
Risks listed and the gap flagged? Here’s the full register.
Session 1 · Module 4 · Work with project documents
Exercise 3 · Answers C
C. Every risk needs an owner and a response.
A risk register is only useful if the gaps are visible.
What your table should show
R1 · 16 High · Aina · pricing requested, not received.
R2 · 9 Medium · Kumar · six accounts to fix.
R3 · 16 High · no owner, no response.
R4 · 9 Medium · Dr Farah Ismail · weekly reminders.
The gap: R3 matches the open issue on existing training records in the minutes. Practice answer: decision 2 in the status report, assigning an owner, would close it.
Put the three tables side by side and a pattern appears: facts, proposals and unknowns.
Session 1 · Module 4 · Work with project documents
Exercise 3 debrief
Facts, proposals and unknowns are different things.
What Exercise 3 showed, and where it pays off at work.
What you learned
A proposal is not an approval. Compare it with what was actually decided.
An action needs an owner and a deadline, or a visible “not assigned”.
A risk without an owner or a response is a gap to escalate, not a detail.
Apply it at work
Quotes and contracts: check price, dates and exclusions against the budget and approvals before signing.
Meeting minutes: turn notes into an action table and send the gaps to the owners.
Team reviews: split the documents across people, then compare findings before the meeting.
Try this week: split one document review with a colleague, then compare what each of you found and cited.
You’ve sorted fact from proposal. Take a break while your report finishes.
Session 1 · Break
Take fifteen.
Back in 15 minutes. Your Studio report keeps building while you are away.
When we’re back, your report is ready: four sources combined into one. That has a name, synthesis.
Session 1 · Module 5 · Save, generate & reuse
Synthesis: combine sources into something new.
Welcome back. Your report should be ready, and it is a synthesis: four sources combined into one briefing.
Summarising makes one source shorter. Synthesising puts several sources together to answer a question none of them answers alone.
Summarise or synthesise?
Summarise: “What do the minutes say?” — one source, shorter.
Synthesise: “Can we sign with Meridian?” — the proposal, the charter and the minutes together (PRJ-04, PRJ-01, PRJ-03).
Task A in Exercise 3 was a synthesis: three sources, one answer to “can we sign?”.
Synthesise well
Tick every source the question needs, and only those.
Ask a question that needs them together, such as “can we sign?”.
Ask for a citation per claim, so you can see which source says what.
Look for where the sources disagree. That is often the finding.
Every claim still traces back to a source you can open.
Synthesis can take many forms. The skill is matching the form to the audience.
Session 1 · Module 5 · Save, generate & reuse
Which Studio output for which job?
Start from the job and the audience, then pick the output. Every one comes from the same checked sources.
You need to…
Use
Learning Hub example
Brief a decision-maker
Reports
Steering committee briefing on budget, approvals and risks
Compare or track items
Data Table
Actions with owner, deadline and status, exported to Sheets
Onboard a new team member
Flashcards
What a new Learning Hub team member needs to know
Update a busy sponsor
Audio Overview (Brief)
A two-minute status update
Stress-test a proposal
Audio Overview (Critique)
The Meridian proposal, critiqued against the charter
Explain to everyone
Video Overview (Short), Infographic
Learning Hub pilot at a glance, for all staff
See the whole picture
Mind Map
Workstreams, risks and decisions in one map
Present at a meeting
Slide Deck (Presenter Slides)
Five slides for the next steering meeting
Check understanding
Quiz
Ten questions after the pilot briefing
Before you share
Notes: save each checked answer with its source.
Review: every output is a draft; check its claims against the sources.
Share: Viewer for readers, Editor only for people who maintain the sources.
Usage refreshes every five hours. If your AI Usage bar is nearly full, choose Generate later and use the trainer’s copy.
Build two framework tables in Studio, check them against the sources and send one to Sheets.
Time
17 minutes · individual
You need
Your Learning Hub Pilot notebook with all five sources ticked.
Steps
In Studio, click Data Table, paste the RACI description below and click Generate now.
Click Data Table again, paste the timeline description and click Generate now.
Open the RACI table. Check one row against the minutes: any role they do not state must say “not documented”.
Open the timeline table. Check three dates and their status: decided, proposed or completed.
On one table, open ⋮ and choose Export to Sheets.
Done when
Two tables built, one RACI row and three dates checked, the gaps still visible, and one table in Sheets.
Save in notebook
Both tables stay in Studio; one is also in Sheets
Finished early?
Make an Audio Overview in the Critique format: “Critique the Meridian proposal against the approved charter.” Note one point the hosts make that you would check.
RACI table description
One row per follow-up action in the steering committee minutes. Columns: action, Responsible, Accountable, Consulted, Informed. Write “not documented” in any cell the minutes do not state.
Timeline table description
One row per key date across all sources, oldest first. Columns: date, event, status (decided, proposed or completed).
Tables built? Compare them with what the sources actually support.
After the workshop: on some plans you can draft from a notebook inside Google Docs. Open the Gemini side panel, type @, pick your notebook and describe the document you need. Check the draft against your sources.
Last slide: the course handout, the feedback form, and how to stay in touch.
Session 1 · Module 7 · Wrap-up & next steps
Terima kasih — let’s stay in touch.
Before you go: save the course handout, and give us two minutes of feedback.

![Five-panel comic. One, You ask a question: a worker asks, "What are the approval steps for our new project?" Two, RAG finds relevant information: a robot says, "Let me search your documents," pointing to Project Proposal, Meeting Notes, Policy Guidelines and Past Projects. Three, AI generates an answer with citations: the robot lists prepare proposal, get department review, finance approval and final sign-off, cited [1][2][3]. Four, You check the sources: the worker says, "Looks good… let me check the sources to be sure," next to three ticked sources. Five, Better answers, fewer surprises: the worker says, "Nice! Now I know where it came from," and the robot says, "Grounded answers make everyone happier!"](images/strip2.png)